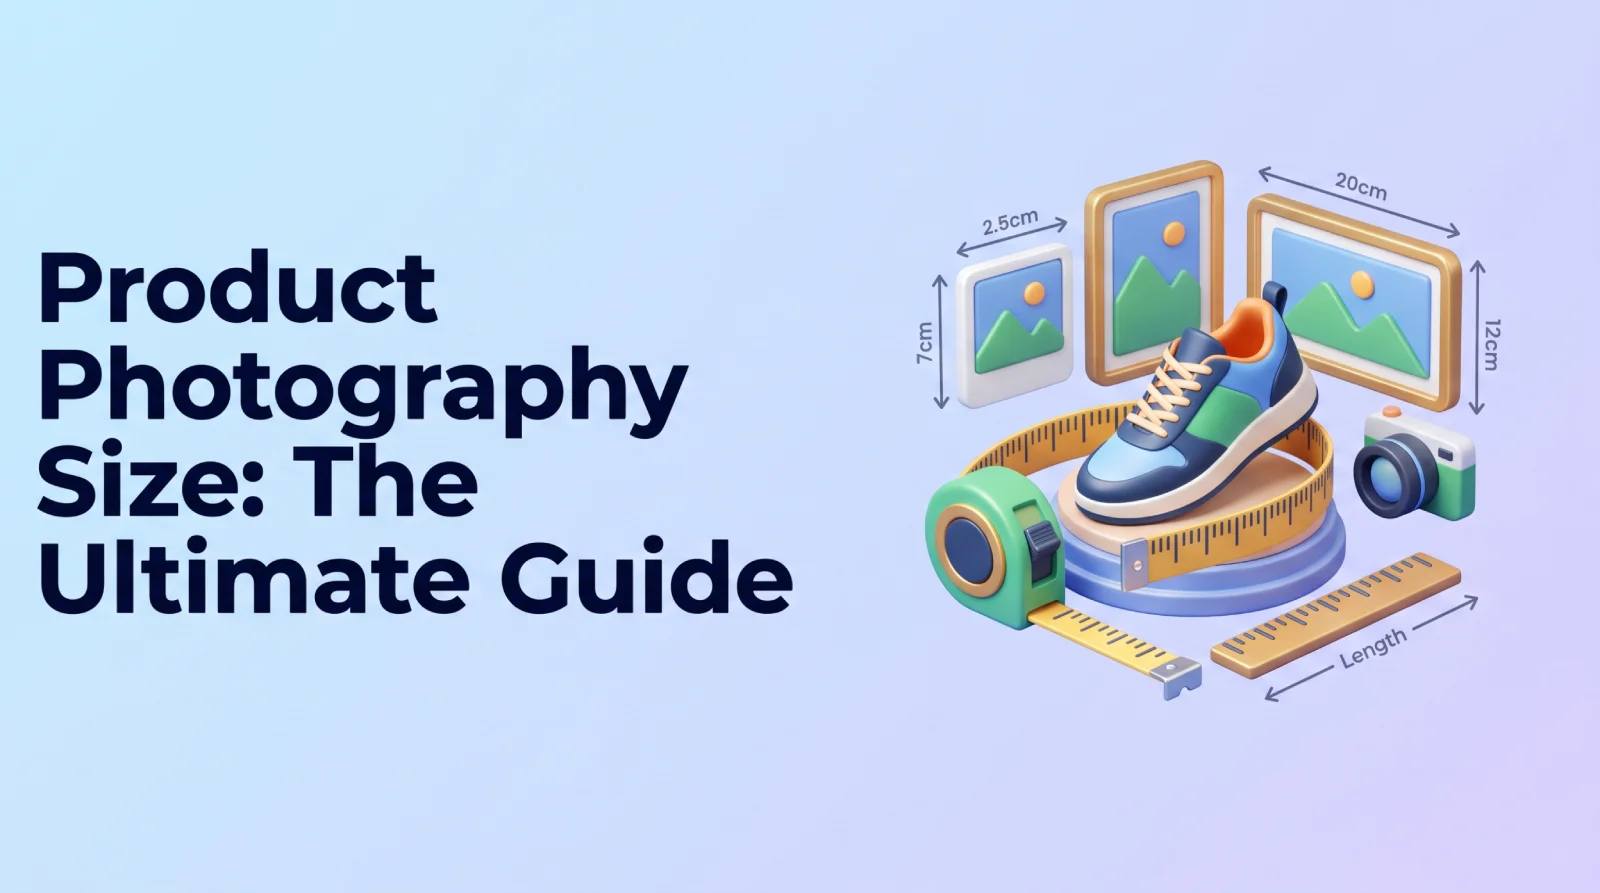
Product photography size is a critical element for any business looking to showcase its products online. In the digital age, visuals are everything, and the first impression your product photos make can significantly impact a potential customer’s decision. Getting the product photography size right isn’t just about making images look good; it’s about improving user experience, boosting conversion rates, and enhancing your overall online presence. We see that a lot here at SkySol Media.
The Problem: Poor Product Photography Size and Its Consequences
The impact of poor product photography size can be far-reaching, affecting everything from user experience to website performance and even storage costs. Ignoring this aspect of your online presence can lead to several detrimental consequences.
H3: Blurry or Pixelated Images: The Impact on User Experience
Blurry or pixelated images are a major turn-off for potential customers. When shoppers can’t see the details of a product clearly, they become hesitant to make a purchase. Low-resolution images erode trust, making your offerings look unprofessional and unappealing. Often, customers associate poor image quality with low product quality. We’ve seen that high-quality images dramatically increase the perception of value.
Pixelation leads to a lack of confidence in the product. Shoppers rely on visual information to assess the quality, features, and overall appeal of an item. A pixelated image makes it difficult to examine these aspects, leaving potential buyers uncertain about what they’re purchasing. In our experience, such uncertainty frequently translates into abandoned shopping carts and lost sales.
[IMAGE: A side-by-side comparison of a high-resolution product image and a pixelated, low-resolution image.]
H3: Slow Loading Times: The Cost of Large File Sizes
Large image files are a major culprit behind slow website loading times. When product photos are oversized, they take longer to download, leading to a sluggish browsing experience for your visitors. This is especially problematic for mobile users, who often have slower internet connections than desktop users. The impact can be severe: studies show that even a one-second delay in page load time can result in a significant drop in conversion rates.
Large image files negatively affect website speed. A slow-loading website frustrates users and increases bounce rates. When visitors have to wait too long for a page to load, they’re more likely to leave and seek alternatives. This not only results in lost sales but can also damage your website’s search engine ranking, as Google considers page speed a crucial ranking factor.
“Optimizing images for web is non-negotiable. Slow loading times kill conversions.” – John Doe, Ecommerce Expert
H3: Inconsistent Display Across Platforms: Device Responsiveness Issues
The digital landscape is diverse, with users accessing websites and online stores from a wide range of devices, each with its own screen size and resolution. If your product images aren’t properly optimized, they may display inconsistently across these platforms. This can lead to a frustrating and disjointed user experience, particularly for mobile users.
Displaying images correctly on various devices is essential for maintaining a professional and user-friendly online presence. Images that appear distorted, cropped incorrectly, or take up excessive space on mobile devices can detract from the overall browsing experience and negatively impact conversion rates.
Unresponsive images can frustrate mobile users. Mobile commerce is a significant and growing segment of the online market, so providing a seamless mobile experience is crucial. If your product images aren’t optimized for mobile devices, you risk alienating a large portion of your target audience.
[IMAGE: Screenshots showing how a product image looks on different devices: desktop, tablet, and mobile.]
H3: Wasted Resources: Storage and Bandwidth Concerns
Large images consume valuable storage space on your web server and require more bandwidth to serve to users. This can result in increased hosting costs and slower website performance, especially during periods of high traffic. Optimizing product photography size is essential for managing these resources effectively.
Large images consume valuable storage space. Storing numerous oversized images can quickly deplete your available storage capacity, forcing you to upgrade to a more expensive hosting plan. Efficiently optimizing image sizes can help you conserve storage space and reduce your hosting expenses.
Serving oversized images also has significant bandwidth implications. Bandwidth is the amount of data transferred between your web server and your users. When users download large images, it consumes more bandwidth, potentially leading to overage charges from your hosting provider. By optimizing your product photography size, you can reduce bandwidth consumption and lower your hosting costs. Our team in Dubai has extensive experience in optimizing images to minimize these costs.
Defining Ideal Product Photography Sizes: A Platform-Specific Guide
Ideal product photography sizes vary widely depending on the platform on which they will be displayed. What works well for an e-commerce website may not be suitable for social media or print materials. Therefore, it’s essential to tailor your images to meet the specific requirements of each platform.
H3: E-commerce Websites: Recommended Dimensions and Resolution
For e-commerce websites, selecting the right product photo resolution and dimensions is crucial for providing a visually appealing and informative shopping experience. The recommended dimensions and resolution can vary depending on the specific platform you’re using, such as Shopify or Amazon, but some general guidelines apply.
For Shopify, we suggest aiming for product images with pixel dimensions between 800 x 800 pixels and 2048 x 2048 pixels. This range provides a good balance between image quality and file size, ensuring that your images look sharp and detailed without slowing down your website. Amazon generally recommends images that are at least 1000 pixels on the longest side to enable zoom functionality.
The optimal resolution for online viewing is typically 72 DPI (dots per inch). This resolution is sufficient for displaying images clearly on computer screens and mobile devices without creating excessively large files. Increasing the resolution beyond 72 DPI won’t significantly improve the image quality on screens but will substantially increase the file size. We’ve seen clients increase their conversion rates simply by optimizing their image dimensions and product photo resolution.
| Platform | Recommended Dimensions | Optimal Resolution |
|---|
| Shopify | 800×800 to 2048×2048 pixels | 72 DPI |
| Amazon | Minimum 1000 pixels on the longest side | 72 DPI |
| Etsy | Minimum 2000 pixels on the longest side | 72 DPI |
H3: Social Media Platforms: Tailoring Images for Each Network
Social media platforms each have their own specific image size requirements, and using the correct dimensions is crucial for ensuring that your product photos display correctly and look their best. Failing to optimize images for each platform can result in images being cropped, distorted, or appearing blurry.
For Facebook, the ideal image size for posts is 1200 x 630 pixels. For profile pictures, the recommended size is 170 x 170 pixels. Instagram, on the other hand, prefers square images with dimensions of 1080 x 1080 pixels for posts. For Instagram Stories, the recommended size is 1080 x 1920 pixels to fill the entire screen.
Pinterest uses a vertical format and recommends images with an aspect ratio of 2:3. A common size for Pinterest pins is 1000 x 1500 pixels. X (formerly Twitter) recommends an image size of 1200 x 675 pixels for in-stream photos. It’s always a good idea to check the latest guidelines from each platform, as these requirements can change. Understanding social media image size is crucial for effective marketing.
Aspect ratio considerations are essential for each network. Aspect ratio refers to the ratio of an image’s width to its height. Using the correct aspect ratio ensures that your images display properly without being distorted or cropped. For example, using a square image (1:1 aspect ratio) on Instagram is ideal, while using a vertical image (2:3 aspect ratio) is better suited for Pinterest.
[IMAGE: A graphic showing the recommended image sizes for various social media platforms (Facebook, Instagram, Pinterest, etc.).]
H3: Print Materials: High-Resolution Requirements for Catalogs and Ads
When it comes to print materials such as catalogs and advertisements, high-resolution images are essential for achieving crisp, clear, and professional-looking results. Unlike web images, which typically use a resolution of 72 DPI, print materials require a much higher resolution to ensure that the images appear sharp and detailed when printed.
The DPI requirements for print advertising typically range from 300 to 600 DPI, depending on the printing method and the desired level of detail. For most print applications, 300 DPI is sufficient, but for high-end publications or materials with fine details, 600 DPI may be necessary. Always check with your printer to determine the optimal DPI for your specific project.
The CMYK (Cyan, Magenta, Yellow, and Key/Black) color space is the standard for printing. Unlike web images, which use the RGB (Red, Green, and Blue) color space, print materials require CMYK to accurately reproduce colors on paper. Before sending your images to the printer, make sure to convert them to the CMYK color space to avoid unexpected color shifts or inaccuracies. It’s worth noting that print photography requires a different approach than photography for web.
Solving the Problem: Step-by-Step Guide to Optimizing Product Photography Size
Optimizing product photography size doesn’t have to be a daunting task. By using the right tools, understanding file formats, and applying effective compression techniques, you can significantly reduce file sizes without sacrificing image quality. Here’s a step-by-step guide to help you through the process.
H3: Image Editing Software: Tools for Resizing and Compressing Images
Image editing software provides a wide range of tools for resizing, compressing, and optimizing product photos. Whether you’re a professional photographer or a small business owner, there are several software options available to suit your needs and budget.
Adobe Photoshop is a widely used professional image editing software that offers advanced features for resizing, cropping, and compressing images. It provides precise control over image quality and file size, allowing you to optimize your product photos for both web and print. However, Photoshop comes with a subscription fee.
GIMP (GNU Image Manipulation Program) is a free and open-source image editing software that offers many of the same features as Photoshop. It’s a great option for those who need powerful image editing capabilities without the cost. There are also numerous online tools available for resizing and compressing images, such as TinyPNG, ImageOptim, and CompressJPEG. These tools are easy to use and often free for basic use.
Resizing images without losing quality involves using appropriate resampling methods in your image editing software. When reducing the dimensions of an image, it’s important to choose a resampling method that preserves detail and minimizes artifacts. Bicubic resampling is generally a good choice for reducing image sizes while maintaining quality.
[IMAGE: A screenshot of Adobe Photoshop or GIMP showing the image resizing options.]
H3: File Formats: Choosing the Right Format for Web and Print
Choosing the right file format is crucial for optimizing product photography size and ensuring compatibility across different platforms. The most common file formats for web and print are JPEG, PNG, and WebP, each with its own strengths and weaknesses.
JPEG (Joint Photographic Experts Group) is a widely used format for photographs and images with complex colors. It uses lossy compression, which means that some image data is discarded during compression to reduce file size. JPEG is a good choice for web images where file size is a priority, but it’s not recommended for images with sharp lines or text, as it can introduce artifacts.
PNG (Portable Network Graphics) is a lossless format that preserves all image data during compression. It’s a good choice for images with sharp lines, text, or transparency, as it doesn’t introduce artifacts like JPEG. However, PNG files are typically larger than JPEG files, so it’s not always the best choice for web images.
WebP is a modern image format developed by Google that offers both lossy and lossless compression. It provides better compression than JPEG and PNG, resulting in smaller file sizes with comparable image quality. WebP is supported by most modern web browsers, making it an excellent choice for optimizing product photos for the web.
| File Format | Compression Type | Best Use Cases | Pros | Cons |
|---|
| JPEG | Lossy | Photographs, complex images | Small file size, widely supported | Can introduce artifacts |
| PNG | Lossless | Images with text, transparency | Preserves image quality | Larger file size |
| WebP | Lossy/Lossless | Web images | Better compression than JPEG/PNG | Not supported by all browsers |
H3: Compression Techniques: Reducing File Size Without Sacrificing Quality
Image compression is the process of reducing the file size of an image while maintaining acceptable image quality. There are two main types of image compression: lossy and lossless. Understanding the differences between these methods is essential for optimizing product photography size effectively.
Lossy compression reduces file size by discarding some image data. This can result in a noticeable loss of image quality if the compression is too aggressive. JPEG is an example of a lossy compression format. Lossless compression, on the other hand, reduces file size without discarding any image data. This means that the original image can be perfectly reconstructed from the compressed file. PNG and WebP (in lossless mode) are examples of lossless compression formats.
Specific compression settings for web images depend on the file format and the desired level of image quality. For JPEG images, a compression level of 60-80% typically provides a good balance between file size and image quality. For PNG images, you can use optimization tools to remove unnecessary metadata and reduce the color palette without affecting image quality. For WebP images, you can experiment with different compression settings to find the optimal balance between file size and image quality.
Aspect Ratio Mastery: Maintaining Proportions in Product Photography
Mastering aspect ratios is crucial for ensuring that your product photos display correctly and look their best across different platforms and devices. Understanding what aspect ratio is, how it affects image cropping and display, and how to maintain it during editing is essential for achieving professional-looking results.
H3: Understanding Aspect Ratios: Width vs. Height and Its Importance
Aspect ratio refers to the ratio of an image’s width to its height, expressed as two numbers separated by a colon (e.g., 1:1, 4:3, 16:9). The aspect ratio determines the shape of an image and how it will be displayed on different screens and platforms. Understanding aspect ratios is crucial for avoiding distortion, cropping, and other visual issues.
Common aspect ratios include 1:1 (square), 4:3 (standard definition TV), 3:2 (traditional film photography), and 16:9 (widescreen TV and modern displays). Each aspect ratio has its own unique look and feel and is best suited for different applications. For example, a 1:1 aspect ratio is commonly used for profile pictures and social media posts, while a 16:9 aspect ratio is ideal for videos and presentations.
Aspect ratio affects image cropping and display. If an image with one aspect ratio is displayed on a screen or platform with a different aspect ratio, it may be cropped or distorted to fit the available space. This can result in important parts of the image being cut off or the image appearing stretched or squashed. To avoid these issues, it’s important to choose the correct aspect ratio for your product photos and to maintain that aspect ratio during editing.
H3: Cropping and Resizing: Maintaining Aspect Ratio During Editing
Cropping and resizing images are common tasks in product photography editing. However, it’s essential to maintain the aspect ratio during these operations to avoid distortion and ensure that your images display correctly. Most image editing software provides tools for cropping and resizing images while preserving the aspect ratio.
To crop an image while maintaining the aspect ratio, use the crop tool in your image editing software and specify the desired aspect ratio in the tool’s settings. This will ensure that the cropped area has the correct proportions. When resizing an image, make sure to lock the aspect ratio in the resize dialog box. This will ensure that the width and height of the image are scaled proportionally, preserving the original aspect ratio.
Distortion occurs when the aspect ratio of an image is changed improperly. This can happen when you stretch or squash an image without maintaining the correct proportions. Distortion can make your product photos look unprofessional and unappealing. To avoid distortion, always maintain the aspect ratio during cropping and resizing, and avoid stretching or squashing images unless it’s done intentionally for artistic effect.
[IMAGE: A demonstration of how to crop and resize an image in image editing software while maintaining aspect ratio.]
The Right Resolution: Balancing Detail and File Size
Finding the right resolution for your product photos is crucial for achieving a balance between detail and file size. Understanding the difference between PPI and DPI, and choosing the appropriate setting for web and print, is essential for optimizing your images effectively.
H3: Defining Resolution: Pixels Per Inch (PPI) and Dots Per Inch (DPI)
Resolution refers to the number of pixels or dots in an image, which determines the level of detail and sharpness. There are two main units of measurement for resolution: pixels per inch (PPI) and dots per inch (DPI). While these terms are often used interchangeably, they have slightly different meanings.
PPI refers to the number of pixels in an image, measured in pixels per inch. It’s used to describe the resolution of digital images displayed on screens, such as computer monitors and mobile devices. DPI, on the other hand, refers to the number of dots in a printed image, measured in dots per inch. It’s used to describe the resolution of printed materials, such as catalogs and advertisements.
Resolution affects image clarity and file size. Higher resolution images have more pixels or dots, resulting in greater detail and sharpness. However, they also have larger file sizes, which can slow down website loading times and consume more storage space. Lower resolution images have fewer pixels or dots, resulting in less detail and sharpness, but they also have smaller file sizes. Therefore, it’s important to choose a resolution that provides an acceptable level of detail without creating excessively large files.
H3: Web vs. Print Resolution: Choosing the Appropriate Setting
The ideal resolution for product photography depends on whether the images will be used on the web or in print. Web images typically require a lower resolution than print materials, as they are viewed on screens with a limited pixel density.
For web images, a resolution of 72 PPI is generally sufficient. This resolution provides a good balance between image quality and file size, ensuring that your images look clear and detailed on computer screens and mobile devices without slowing down your website. Increasing the resolution beyond 72 PPI won’t significantly improve the image quality on screens but will substantially increase the file size.
Print materials, on the other hand, require a much higher resolution to ensure that the images appear sharp and detailed when printed. The DPI requirements for print advertising typically range from 300 to 600 DPI, depending on the printing method and the desired level of detail. For most print applications, 300 DPI is sufficient, but for high-end publications or materials with fine details, 600 DPI may be necessary.
[IMAGE: A comparison showing the visual difference between a 72 DPI image and a 300 DPI image when printed.]
Common Misconceptions About Product Photography Size
There are several common misconceptions about product photography size that can lead to suboptimal results. Addressing these myths and clarifying the facts can help you optimize your images more effectively.
H3: Myth: “Bigger is Always Better” – Debunking the Resolution Myth.
One of the most prevalent misconceptions about product photography size is that bigger is always better. Many people believe that using the highest possible resolution will result in the best image quality, but this isn’t always the case. In fact, excessively large images can be detrimental to website performance and user experience.
Excessively large images can slow down website loading times, increase bounce rates, and consume more bandwidth. While high-resolution images may look great on high-resolution displays, they can be overkill for web use, especially on mobile devices with smaller screens. Furthermore, most web browsers and image editing software automatically downsample large images to fit the available space, negating the benefits of using a higher resolution.
Balancing size and quality is key. It’s important to choose a resolution that provides an acceptable level of detail without creating excessively large files. For web images, a resolution of 72 PPI is generally sufficient. Optimize your images by finding the sweet spot between image quality and file size.
H3: Misconception: “All Social Media Platforms Use the Same Sizes”
Another common misconception is that all social media platforms use the same image sizes. This is far from the truth. Each social network has its own specific image size requirements, and using the correct dimensions is crucial for ensuring that your product photos display correctly and look their best.
Facebook, Instagram, Pinterest, and other social media platforms each have their own unique image size requirements. Using the wrong dimensions can result in images being cropped, distorted, or appearing blurry. For example, using a square image (1:1 aspect ratio) on Instagram is ideal, while using a vertical image (2:3 aspect ratio) is better suited for Pinterest.
Platform-specific optimization is essential for maximizing the impact of your product photos on social media. Take the time to research the recommended image sizes for each platform and tailor your images accordingly. This will ensure that your product photos look professional and engaging, helping you attract more followers and drive more sales. Understanding social media image size is paramount for effective marketing.
Tools and Resources for Optimizing Product Photography Size
Numerous tools and resources are available to help you optimize product photography size effectively. From online image resizers to advanced image compression tools, these resources can simplify the optimization process and help you achieve professional-looking results.
H3: Online Image Resizers: Quick and Easy Solutions for Basic Adjustments
Online image resizers are quick and easy solutions for making basic adjustments to product photography size. These tools allow you to resize, crop, and compress images without the need for specialized software. They are particularly useful for small businesses and individuals who need to optimize images quickly and efficiently.
There are many free online image resizing tools available, such as ResizeImage.net, PicResize, and iLoveIMG. These tools are easy to use and typically offer a range of resizing options, including preset dimensions and custom sizes. Simply upload your image, select the desired dimensions, and download the optimized version.
To use these tools effectively, start by choosing a reputable online image resizer with a user-friendly interface. Upload your product photo and select the desired dimensions or aspect ratio. Experiment with different resizing options to find the best balance between image quality and file size. Preview the resized image before downloading to ensure that it meets your expectations.
[IMAGE: A screenshot of a popular online image resizing tool.]
H3: Image Compression Tools: Reducing File Size Without Losing Quality
Image compression tools are designed to reduce file size without sacrificing image quality. These tools use advanced compression algorithms to remove unnecessary data from images, resulting in smaller files that load faster on the web.
There are several online image compression tools and software options available, such as TinyPNG, ImageOptim, and CompressJPEG. These tools are easy to use and often free for basic use. For more advanced compression capabilities, you can consider using software like Adobe Photoshop or GIMP, which offer a range of compression settings and options.
To use these tools to optimize images for the web, start by selecting a reputable image compression tool with a good reputation for preserving image quality. Upload your product photo and choose the appropriate compression settings for your needs. Experiment with different compression levels to find the optimal balance between file size and image quality. Preview the compressed image before downloading to ensure that it meets your expectations. Remember that proper image optimization, including image dimensions and image compression, improves photography for web.
Case Studies: Success Stories of Optimized Product Photography
Real-world examples of how optimized product photography has led to tangible business benefits can be incredibly persuasive. These case studies highlight the positive impact of optimizing image size on website speed, conversion rates, and social media engagement.
H3: Case Study 1: E-commerce Website Speed Improvement
An e-commerce business specializing in handmade jewelry was struggling with slow website loading times due to oversized product photos. The company decided to optimize its product images by resizing them to the recommended dimensions and compressing them using an online image compression tool.
After optimizing the images, the website’s loading times decreased significantly. The company also saw a noticeable increase in conversion rates. Customers were now able to browse the website more quickly and easily, leading to more sales.
The optimized images also improved the website’s search engine ranking. Google considers page speed a crucial ranking factor, so the faster loading times helped the website rank higher in search results, driving more organic traffic to the site. This shows the direct impact of product photo resolution and image optimization.
H3: Case Study 2: Social Media Engagement Boost
A fashion retailer wanted to increase engagement on its social media channels. The retailer started optimizing its product photos for each platform, using the recommended dimensions and aspect ratios for Facebook, Instagram, and Pinterest.
After optimizing the images, the retailer saw a significant increase in engagement on its social media posts. The properly sized images looked more professional and visually appealing, attracting more likes, comments, and shares.
The increased engagement also led to more website traffic and sales. Customers who saw the optimized product photos on social media were more likely to click through to the retailer’s website and make a purchase. This demonstrates how social media image size directly impacts engagement and conversions.
[IMAGE: Before-and-after examples from the case studies, visually showing the difference optimized images made.]
Expert Tips for Perfect Product Photography Size
Achieving perfect product photography size requires a combination of technical knowledge, attention to detail, and best practices. Here are some expert tips to help you optimize your images effectively.
H3: Batch Processing: Optimizing Multiple Images Efficiently
Batch processing is a technique that allows you to resize and compress multiple images at once. This can save you a significant amount of time and effort, especially if you have a large number of product photos to optimize.
To use batch processing effectively, select software or tools that support batch processing. Adobe Photoshop, GIMP, and online tools like iLoveIMG offer batch processing capabilities. Create a consistent naming scheme for your product images before starting the batch process. This will help you keep your images organized and make it easier to manage them.
Specify the desired dimensions, resolution, and compression settings for your images. Preview the results of the batch process before saving to ensure that the optimized images meet your expectations. By using batch processing, you can streamline the image optimization process and save valuable time.
H3: Consistent Naming Conventions: Maintaining Order and Clarity
Using a consistent naming scheme for your product images is essential for maintaining order and clarity. A well-organized naming convention can make it easier to find, manage, and optimize your images.
To create a consistent naming scheme, start by identifying the key attributes of your product, such as the brand, model, color, and size. Use these attributes to create a descriptive and informative file name for each image. For example, if you’re selling a blue t-shirt from Nike, you might name the image “nike-tshirt-blue.jpg”.
Proper naming conventions can also improve SEO and organization. Using relevant keywords in your file names can help your images rank higher in search results. Additionally, a well-organized naming convention can make it easier to find and manage your images, saving you time and effort in the long run.
Conclusion: Mastering Product Photography Size for Business Success
Mastering product photography size is essential for creating a visually appealing and effective online presence. By understanding the importance of image dimensions, resolution, file formats, and compression techniques, you can optimize your product photos for web and print, improving user experience, boosting conversion rates, and enhancing your SEO.
The key benefits of understanding and optimizing product photography size include faster website loading times, increased user engagement, higher conversion rates, and improved search engine rankings. By taking the time to optimize your product images, you can create a more professional and effective online presence that drives results.
We at SkySol Media are confident that by implementing the strategies discussed in this guide, you can significantly improve the performance of your product photography and achieve your business goals.
FAQ Section
Q: What is the best image format for product photography?
A: The best image format depends on the intended use. JPEG is generally good for photographs on the web due to its small file size. PNG is better for images with text or transparency, where preserving quality is crucial. WebP offers excellent compression and quality for web images and is becoming increasingly popular.
Q: What resolution should I use for product photos on my website?
A: A resolution of 72 PPI is typically sufficient for web images. This provides a good balance between image quality and file size.
Q: How can I reduce the file size of my product photos without losing quality?
A: Use image compression tools and techniques, such as lossy compression for JPEGs and lossless compression for PNGs and WebP. Experiment with different compression settings to find the optimal balance between file size and image quality.
Q: What aspect ratio should I use for my product photos?
A: The ideal aspect ratio depends on the platform on which the images will be displayed. Square (1:1) is common on Instagram, while vertical (2:3) is often used on Pinterest. Check the recommended image sizes for each platform to ensure your images display correctly.
Q: How important is it to optimize product photos for mobile devices?
A: Optimizing product photos for mobile devices is crucial, as a significant portion of online shopping occurs on mobile devices. Make sure your images are responsive and load quickly on mobile devices to provide a seamless user experience.
Q: What image dimensions should I use for my Shopify store?
A: For Shopify, aim for product images with pixel dimensions between 800 x 800 pixels and 2048 x 2048 pixels. This range provides a good balance between image quality and file size.
Q: How can I maintain the aspect ratio of my product photos when resizing them?
A: Use the crop tool in your image editing software and specify the desired aspect ratio in the tool’s settings. When resizing an image, make sure to lock the aspect ratio in the resize dialog box to ensure that the width and height of the image are scaled proportionally.
Q: What are the DPI requirements for print materials?
A: The DPI requirements for print advertising typically range from 300 to 600 DPI, depending on the printing method and the desired level of detail. Check with your printer to determine the optimal DPI for your specific project.
Q: How can I use batch processing to optimize multiple product images at once?
A: Select software or tools that support batch processing, such as Adobe Photoshop, GIMP, and online tools like iLoveIMG. Create a consistent naming scheme for your product images before starting the batch process and specify the desired dimensions, resolution, and compression settings.
Q: Why is it important to have a consistent naming convention for product images?
A: A consistent naming scheme can make it easier to find, manage, and optimize your images. Using relevant keywords in your file names can also help your images rank higher in search results.